Deploy as a Web App to Automate Google Workspace
Google Apps Script can programmatically interact with Sheets, Drive, Docs, and other Google Workspace services. You can take it a step further by deploying it as a web app — giving users a simple UI to trigger these operations.
Why a Web App?
Apps Script typically runs attached to a specific Sheet or via triggers. A web app makes sense when you need:
- A standalone interface
- User-provided parameters for different operations
- Functionality that works without opening a specific Sheet
Setting Up
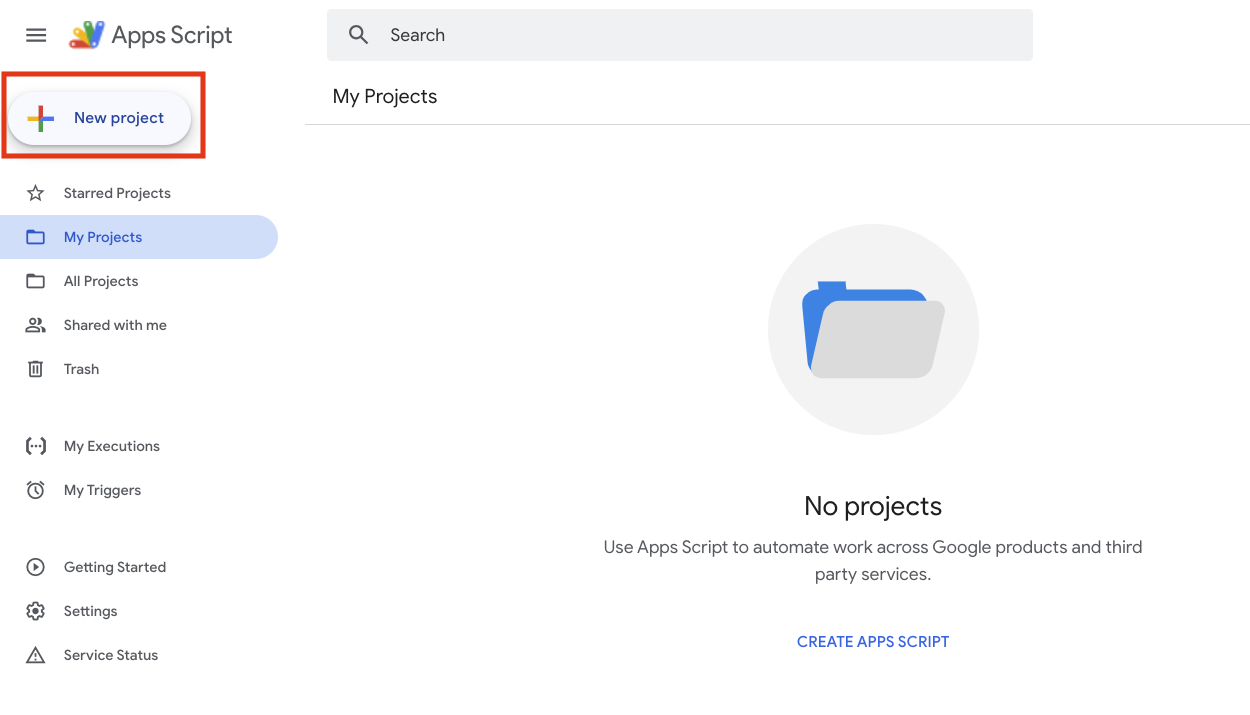
Create a New Project
- Go to Google Apps Script
- Click "New project"
- Name your project
Project File Structure
A reasonable way to organize your script:
your script project
your-project/
├── Code.gs      # Main logic
├── index.html   # Web interface
├── style.html   # CSS styles
└── script.html  # Frontend JavaScript
Core Setup
1. Entry Point (Code.gs)
Code.gs
function doGet() {
  return HtmlService.createTemplateFromFile('index')
    .evaluate()
    .setTitle('Automation Tool')
    .addMetaTag('viewport', 'width=device-width, initial-scale=1');
}

// import other HTML files
function include(filename) {
  return HtmlService.createHtmlOutputFromFile(filename).getContent();
}
2. Interface (index.html)
index.html
<!DOCTYPE html>
<html>
  <head>
    <base target="_top">
    <?!= include('style'); ?>
  </head>
  <body>
    <div class="container">
      <!-- Your forms and UI elements -->
    </div>
    <?!= include('script'); ?>
  </body>
</html>
Automation Examples
1. Google Sheets
Code.gs
function updateSheet(params) {
  try {
    const { spreadsheetId, sheetName, data } = params;
    const spreadsheet = SpreadsheetApp.openById(spreadsheetId);
    const sheet = spreadsheet.getSheetByName(sheetName);

    sheet.getRange(params.range).setValues(data);

    return { status: 'success', message: 'Update complete' };
  } catch (error) {
    return { status: 'error', message: error.toString() };
  }
}
2. Google Drive
Code.gs
function createFolders(params) {
  try {
    const { parentFolderId, folderName } = params;
    const parentFolder = DriveApp.getFolderById(parentFolderId);
    const newFolder = parentFolder.createFolder(folderName);

    return {
      status: 'success',
      folderId: newFolder.getId(),
      folderUrl: newFolder.getUrl()
    };
  } catch (error) {
    return { status: 'error', message: error.toString() };
  }
}
3. Frontend Calls (script.html)
script.html
function executeOperation() {
  const params = {
    spreadsheetId: document.getElementById('spreadsheetId').value,
    sheetName: document.getElementById('sheetName').value,
    // other params
  };

  google.script.run
    .withSuccessHandler(onSuccess)
    .withFailureHandler(onError)
    .updateSheet(params);
}

function onSuccess(response) {
  if (response.status === 'success') {
    showMessage('success', response.message);
  }
}

function onError(error) {
  showMessage('error', error.toString());
}
UI Design
1. Basic Form
index.html
<div class="form-group">
  <label for="spreadsheetId">Spreadsheet ID:</label>
  <input
    type="text"
    id="spreadsheetId"
    placeholder="Copy the ID from your Google Sheets URL"
  >
  <div class="helper-text">
    Find it in the Google Sheets URL:
    https://docs.google.com/spreadsheets/d/[SPREADSHEET_ID]/edit
  </div>
</div>
2. Feedback Messages
index.html
<div id="message" class="message" style="display: none;">
  <span class="message-text"></span>
</div>
Deployment
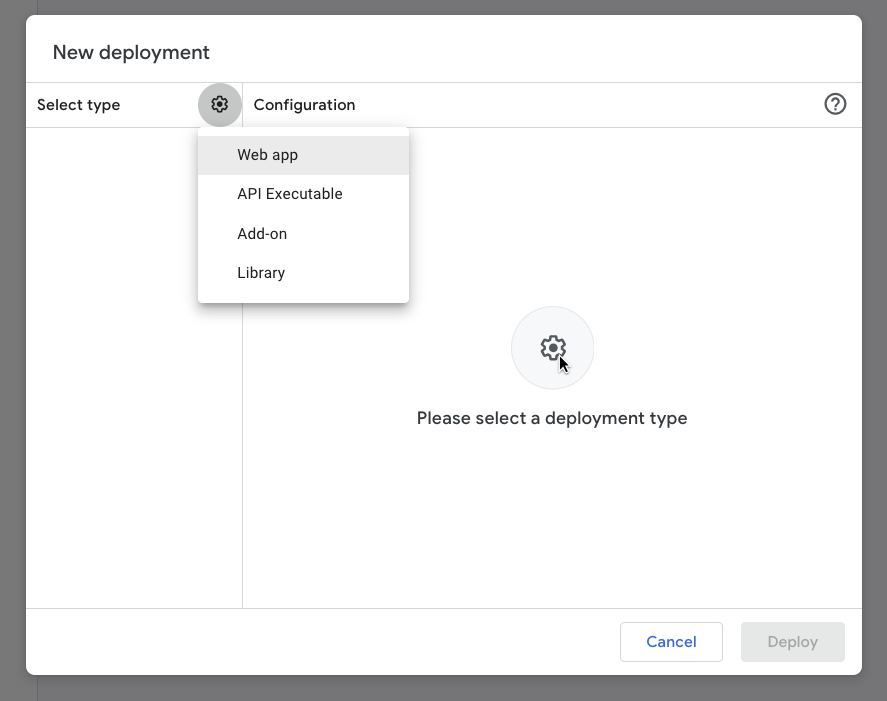
1. Create a New Deployment
- Click "Deploy" > "New deployment"
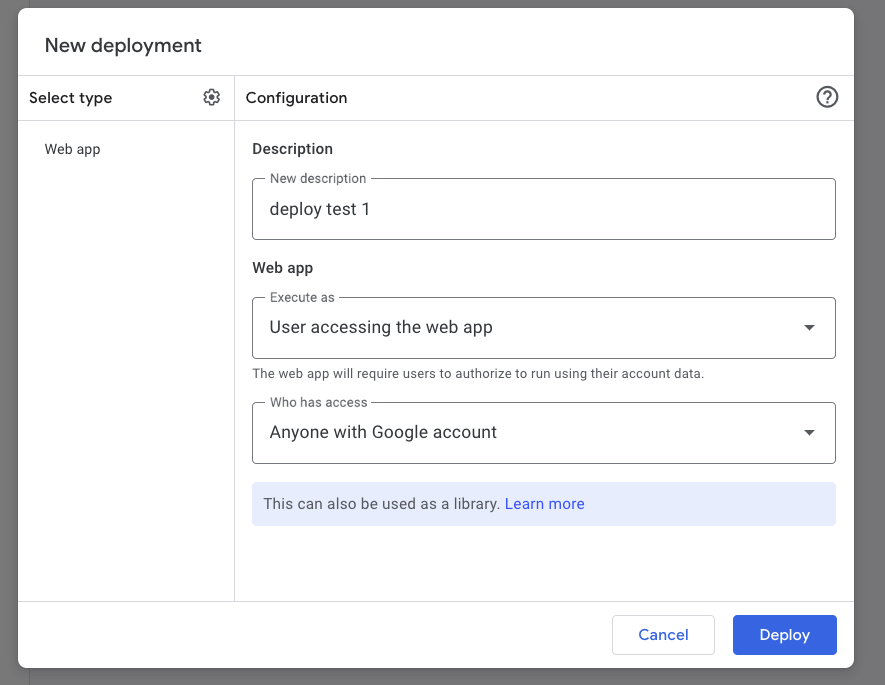
- Select "Web app"
- Set the execution identity and access permissions
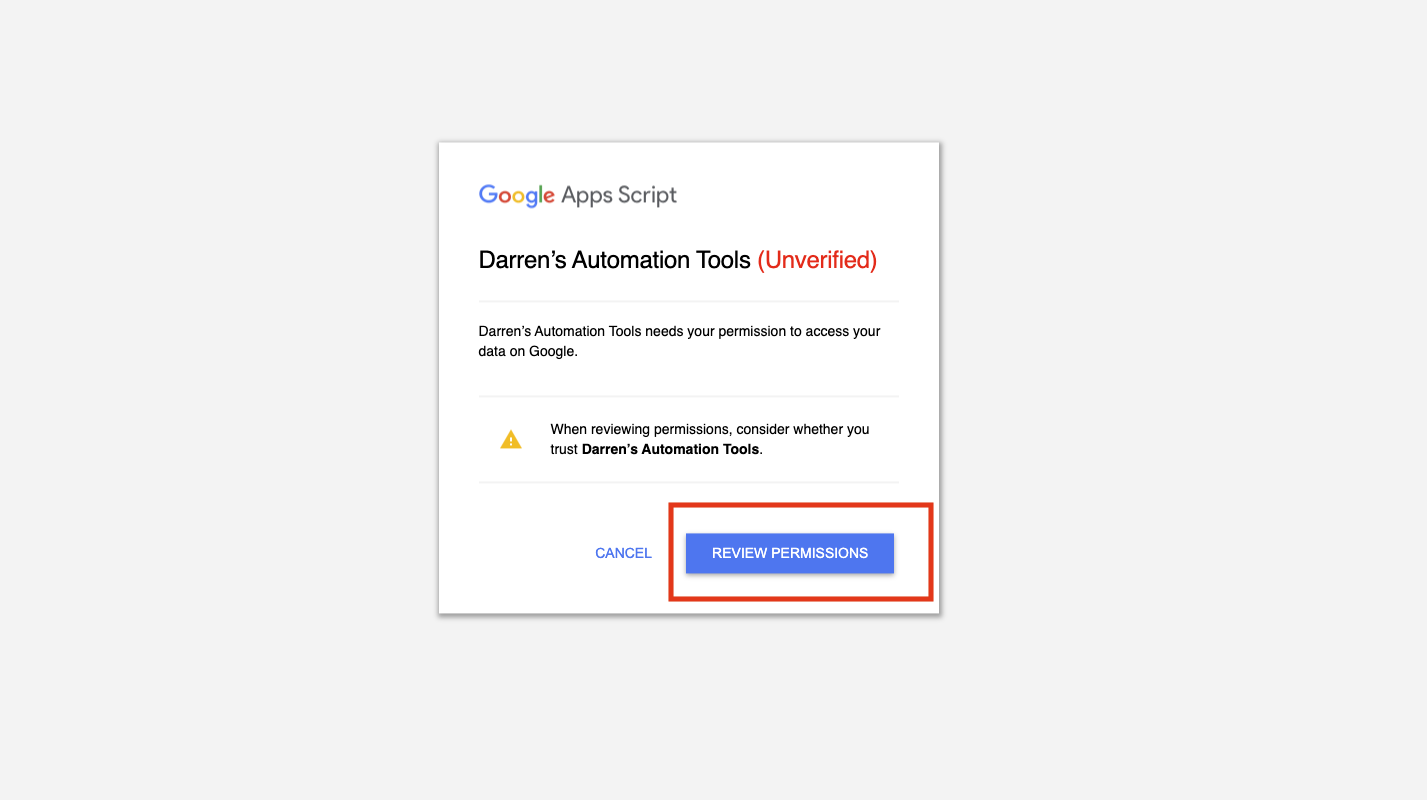
2. Authorization
On the first deployment, you'll be prompted to grant access to Google Workspace services:
- Accept the authorization request
- Sign in with your Google account
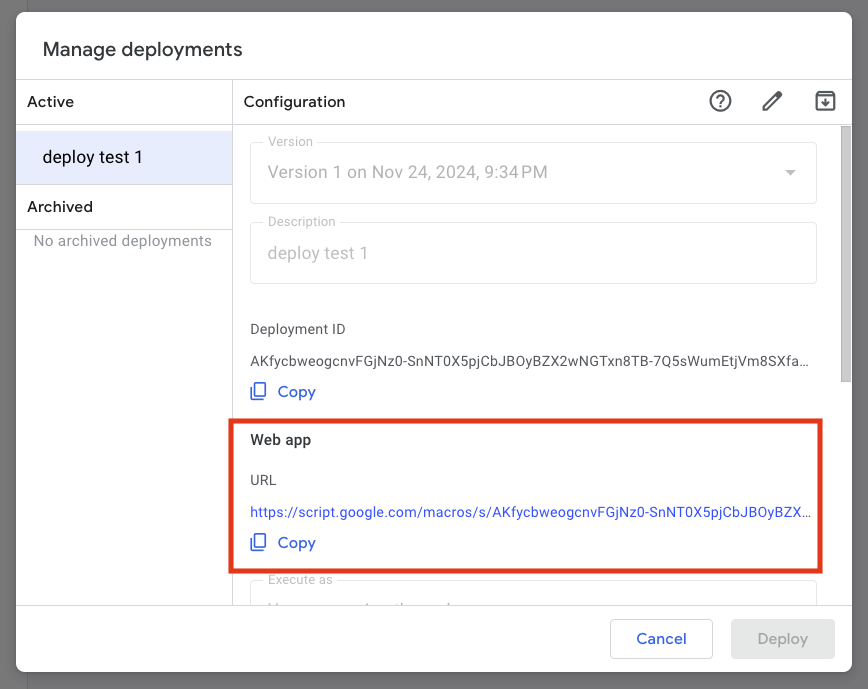
3. Get the App URL
After deployment, you get a URL to share with users.
Result
Users sign in, enter a spreadsheet ID and sheet name, and hit run. A success message confirms the operation.
