Interface Overview
A quick tour of what's on screen in Power Automate Desktop.
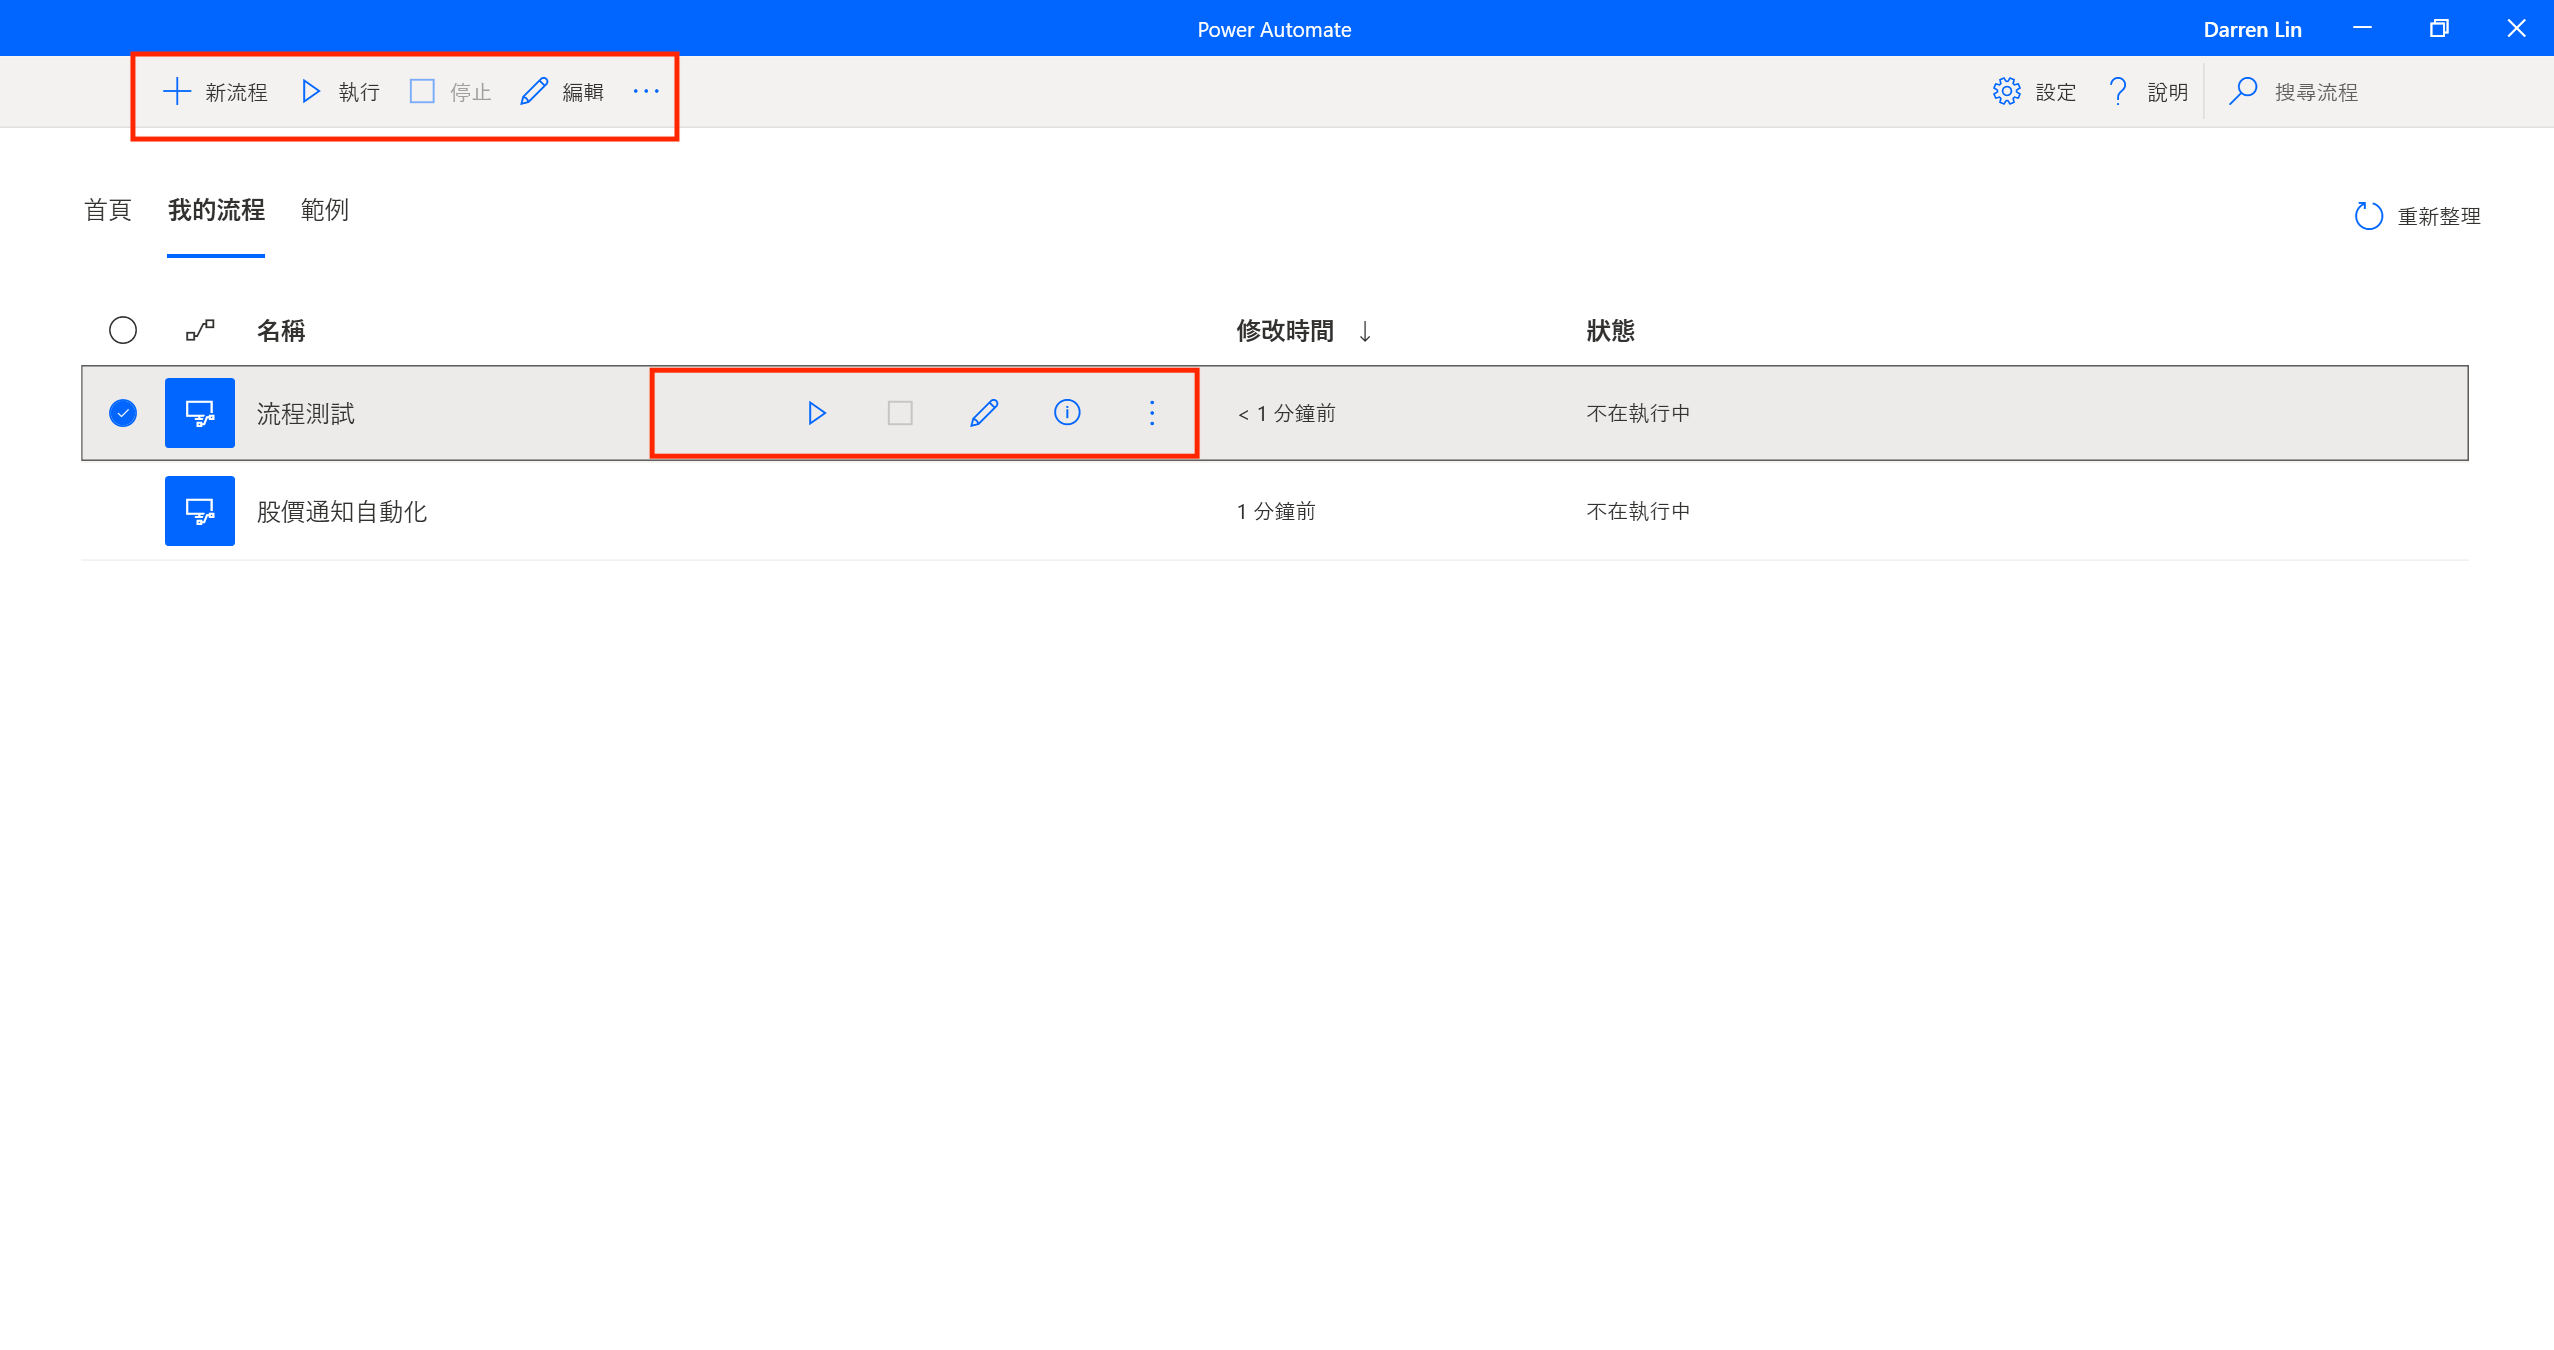
Toolbar & Flows Pane
The toolbar at the top has your main controls. Below it, the flows pane lists all your flows — click to open, right-click for copy/delete.
- New flow: Start a new automation.
- Run: Test a flow.
- Stop: Halt execution.
- Edit: Open the editor.
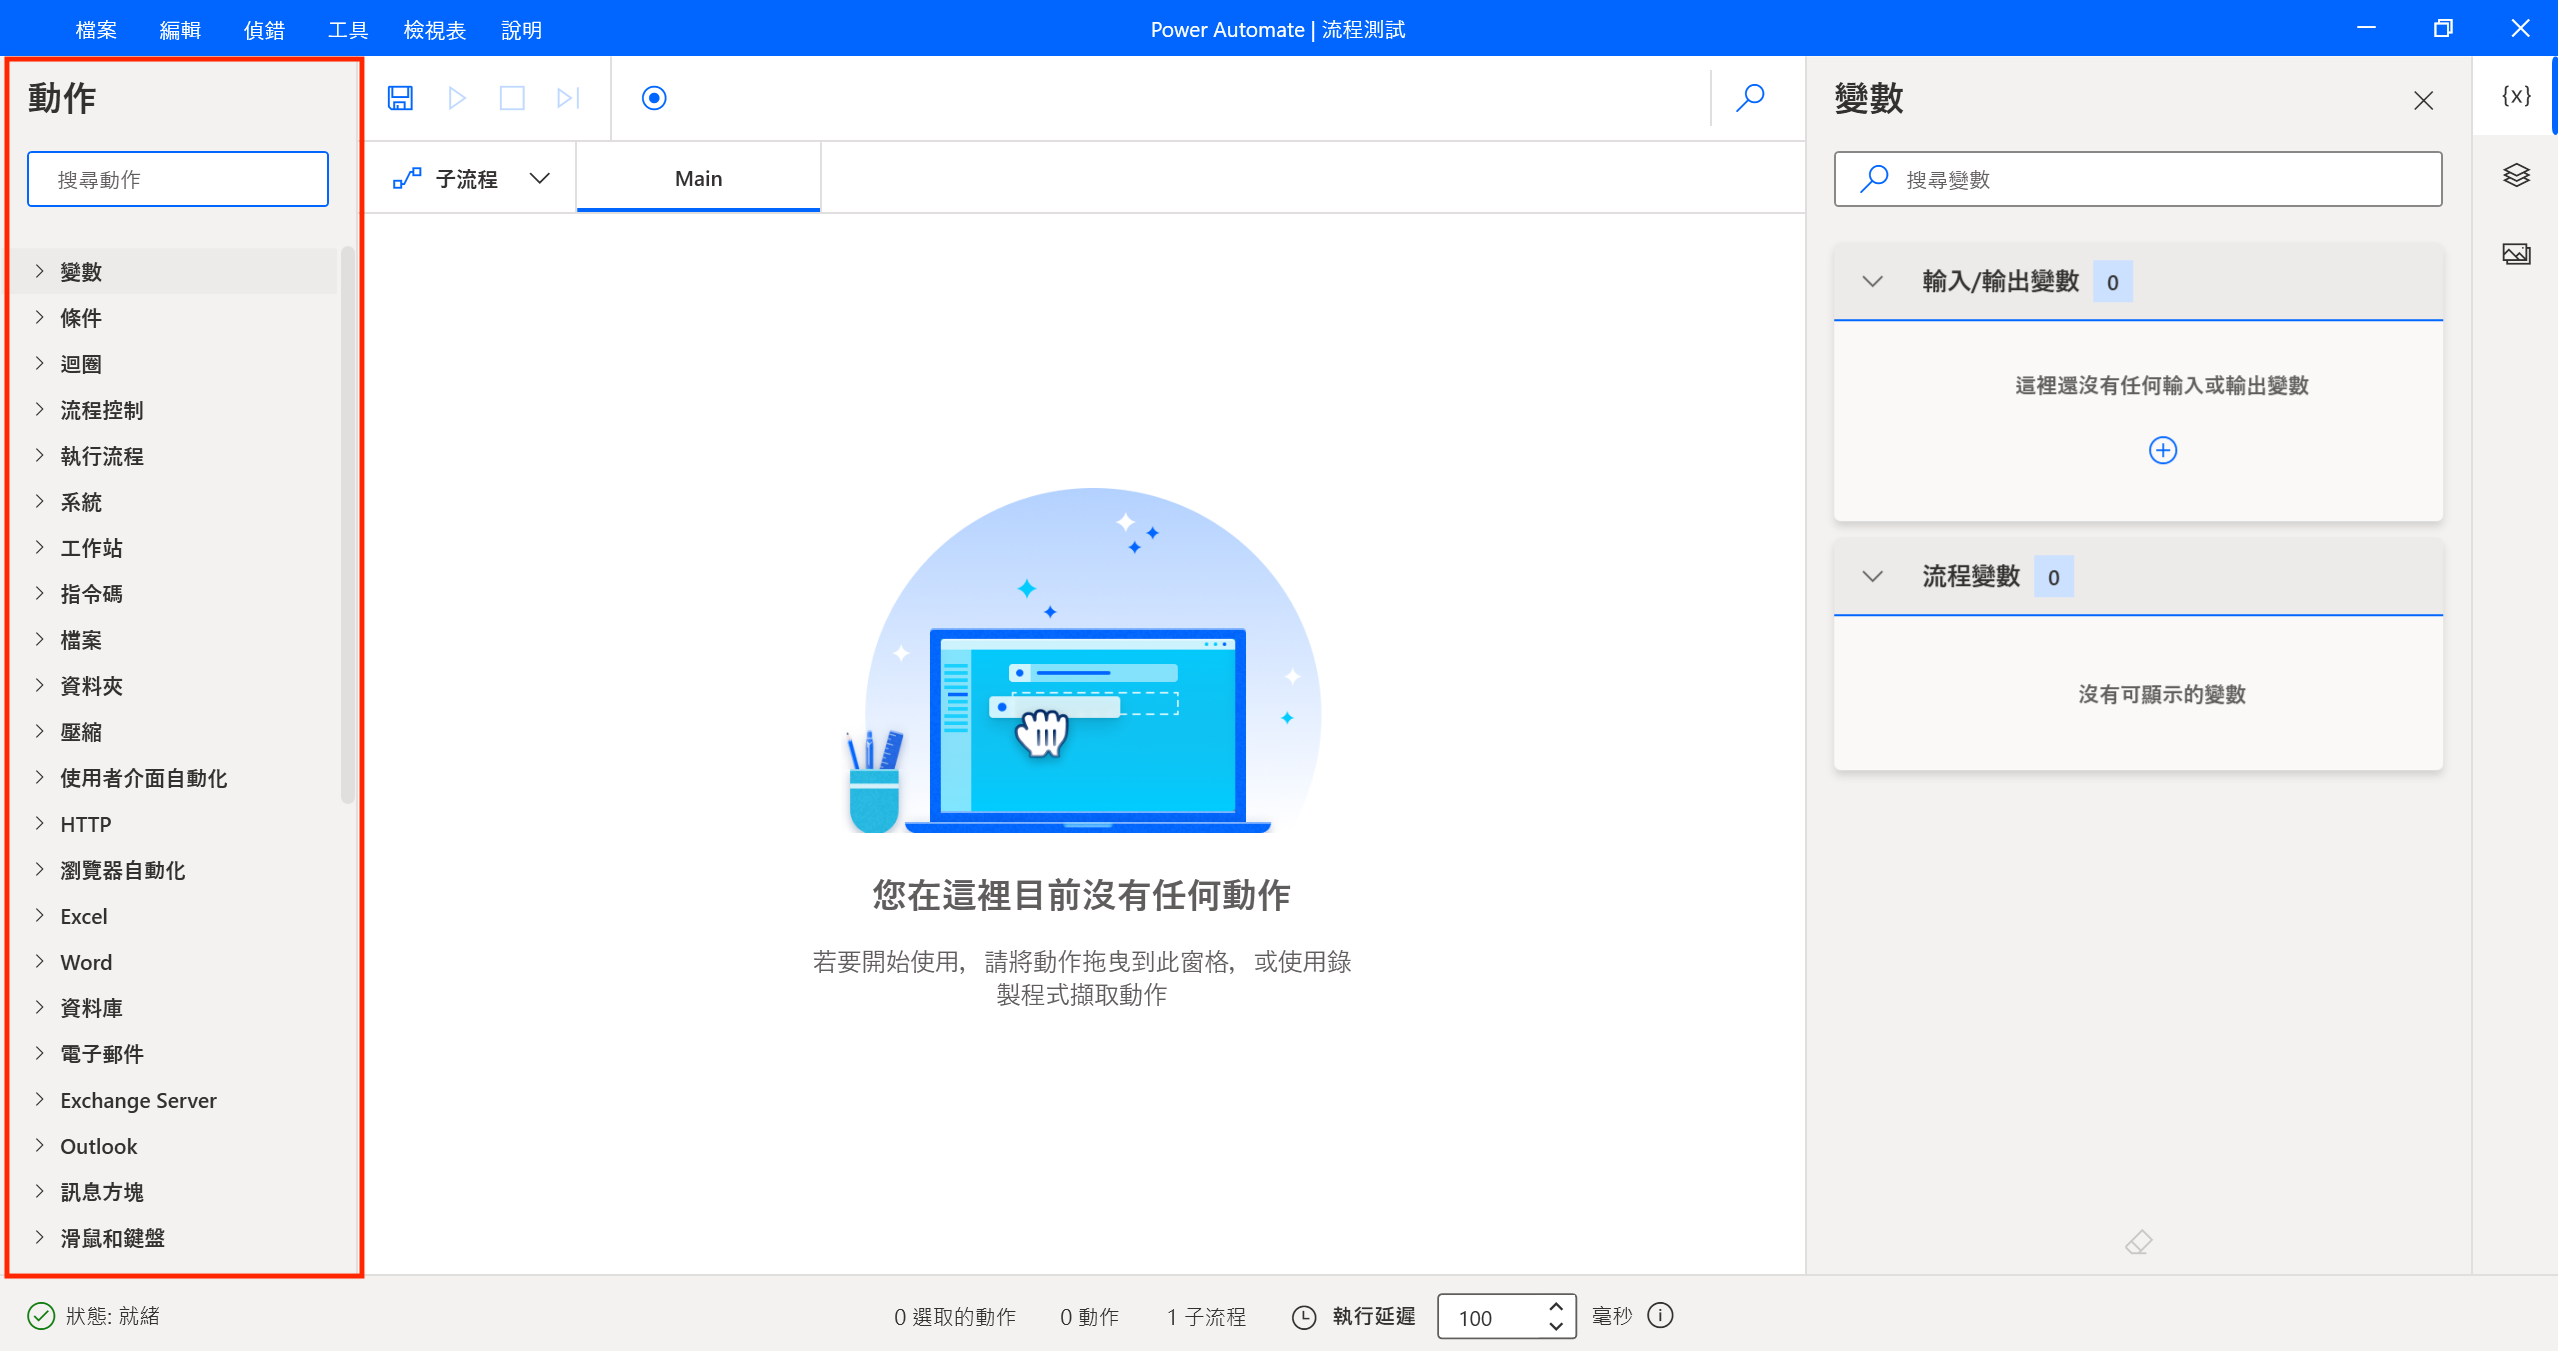
Actions Pane
On the right. All built-in RPA actions live here — drag them into the workspace to build your flow.
Common categories:
- UI automation: Click buttons, fill text fields, interact with app elements.
- Browser automation: Drive Edge, Chrome, etc.
- Files/Folders: File and directory operations.
- Excel: Read/write spreadsheet data.
- Loops: Repeat actions.
- Conditionals: If/else branching.
- Variables: Store data during execution.
- Email: Send or receive emails.
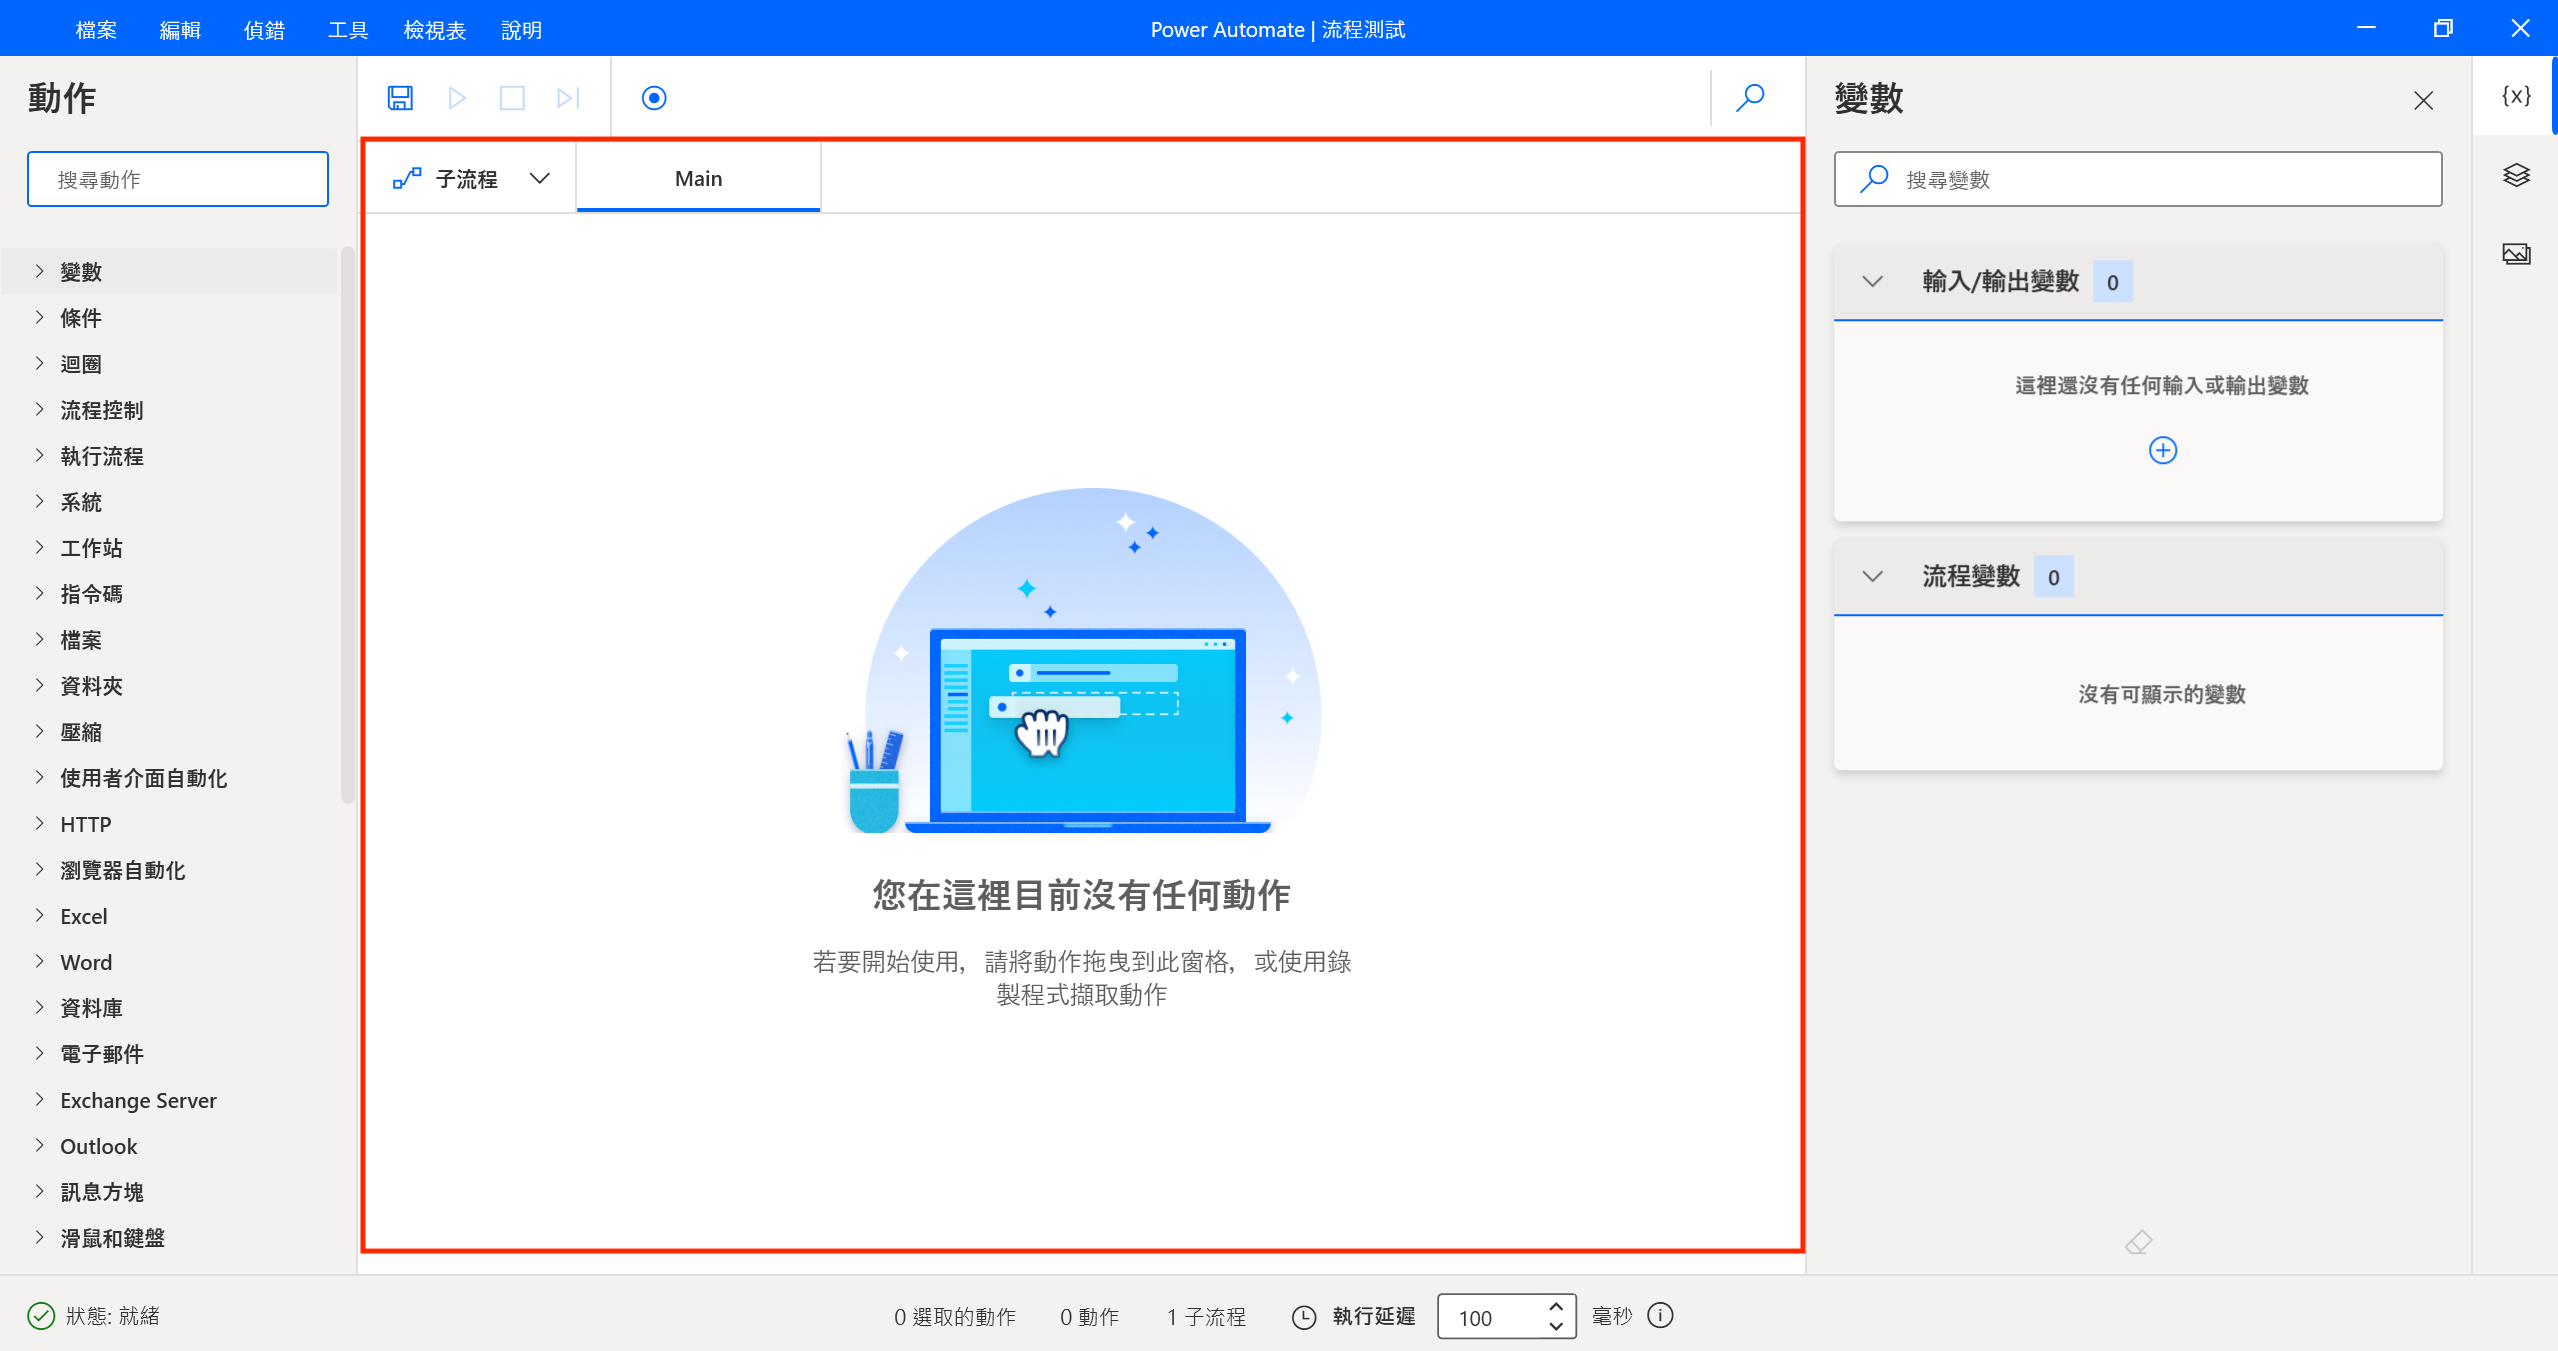
Workspace
The main area in the center. This is where you assemble your flow.
- Drag actions from the Actions Pane.
- Actions display in execution order, like a flowchart.
- Errors show up as red highlights.
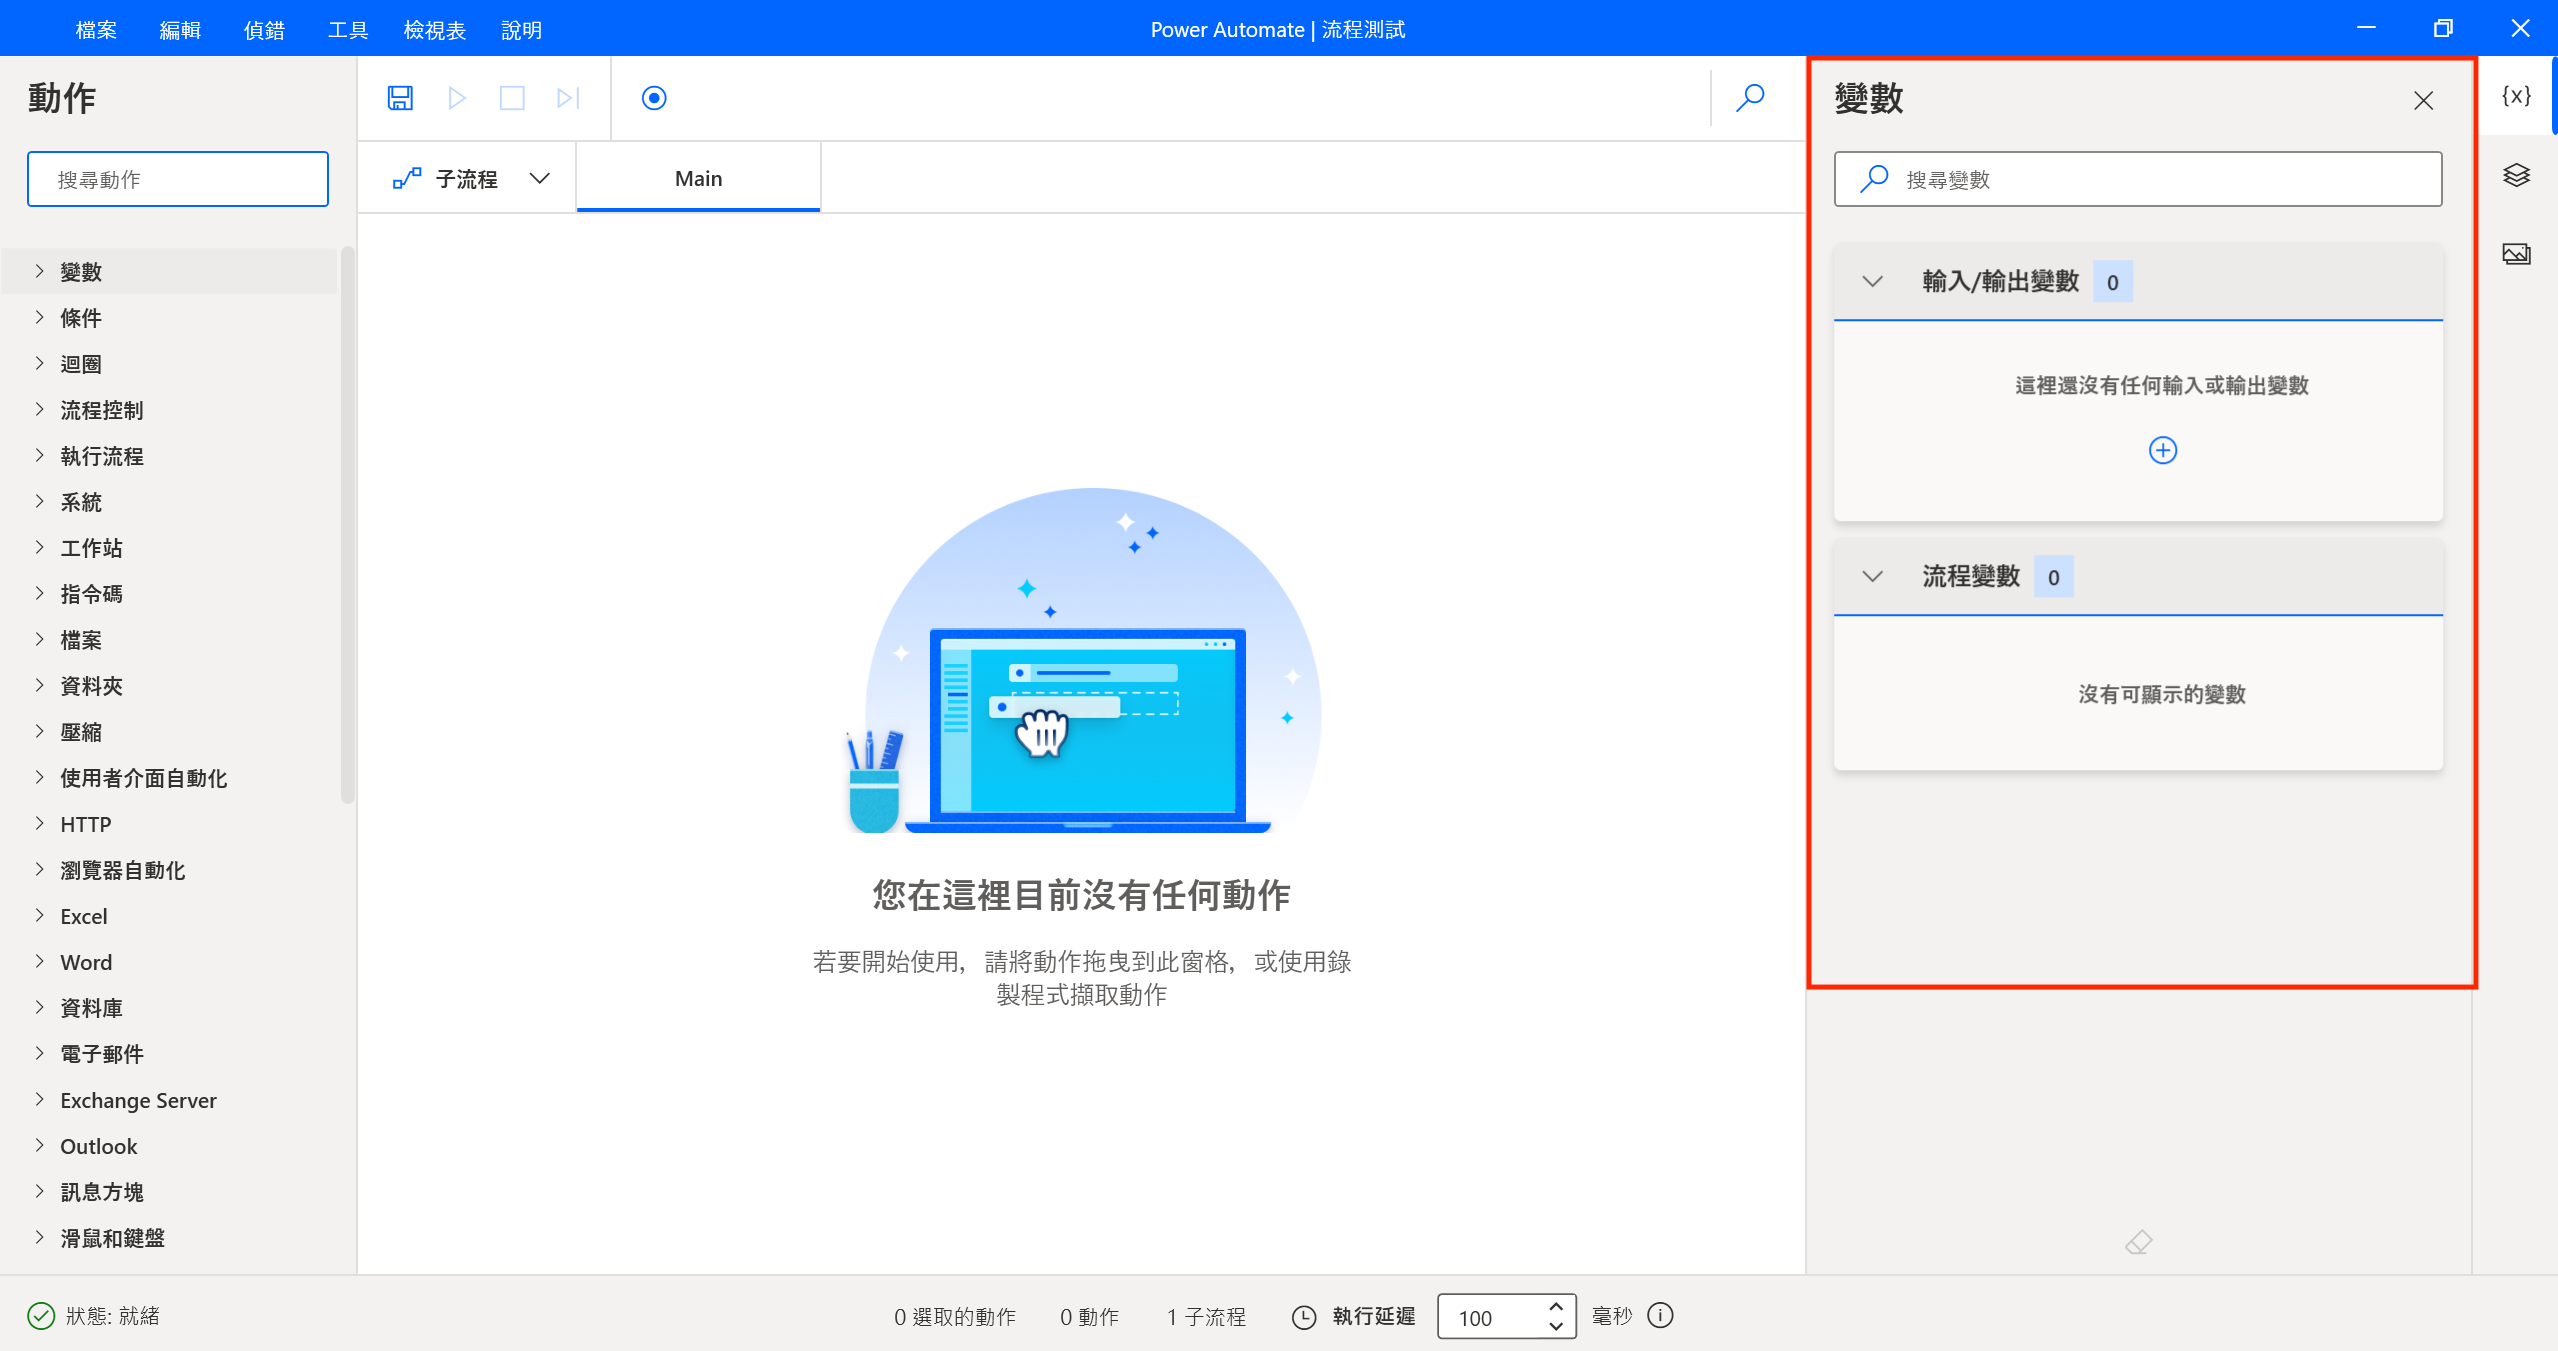
Variables Pane
Holds dynamic data during execution — calculation results, file paths, scraped data, etc.
- Input/Output Variables: External input or returned results.
- Flow Variables: Everything generated during the run.
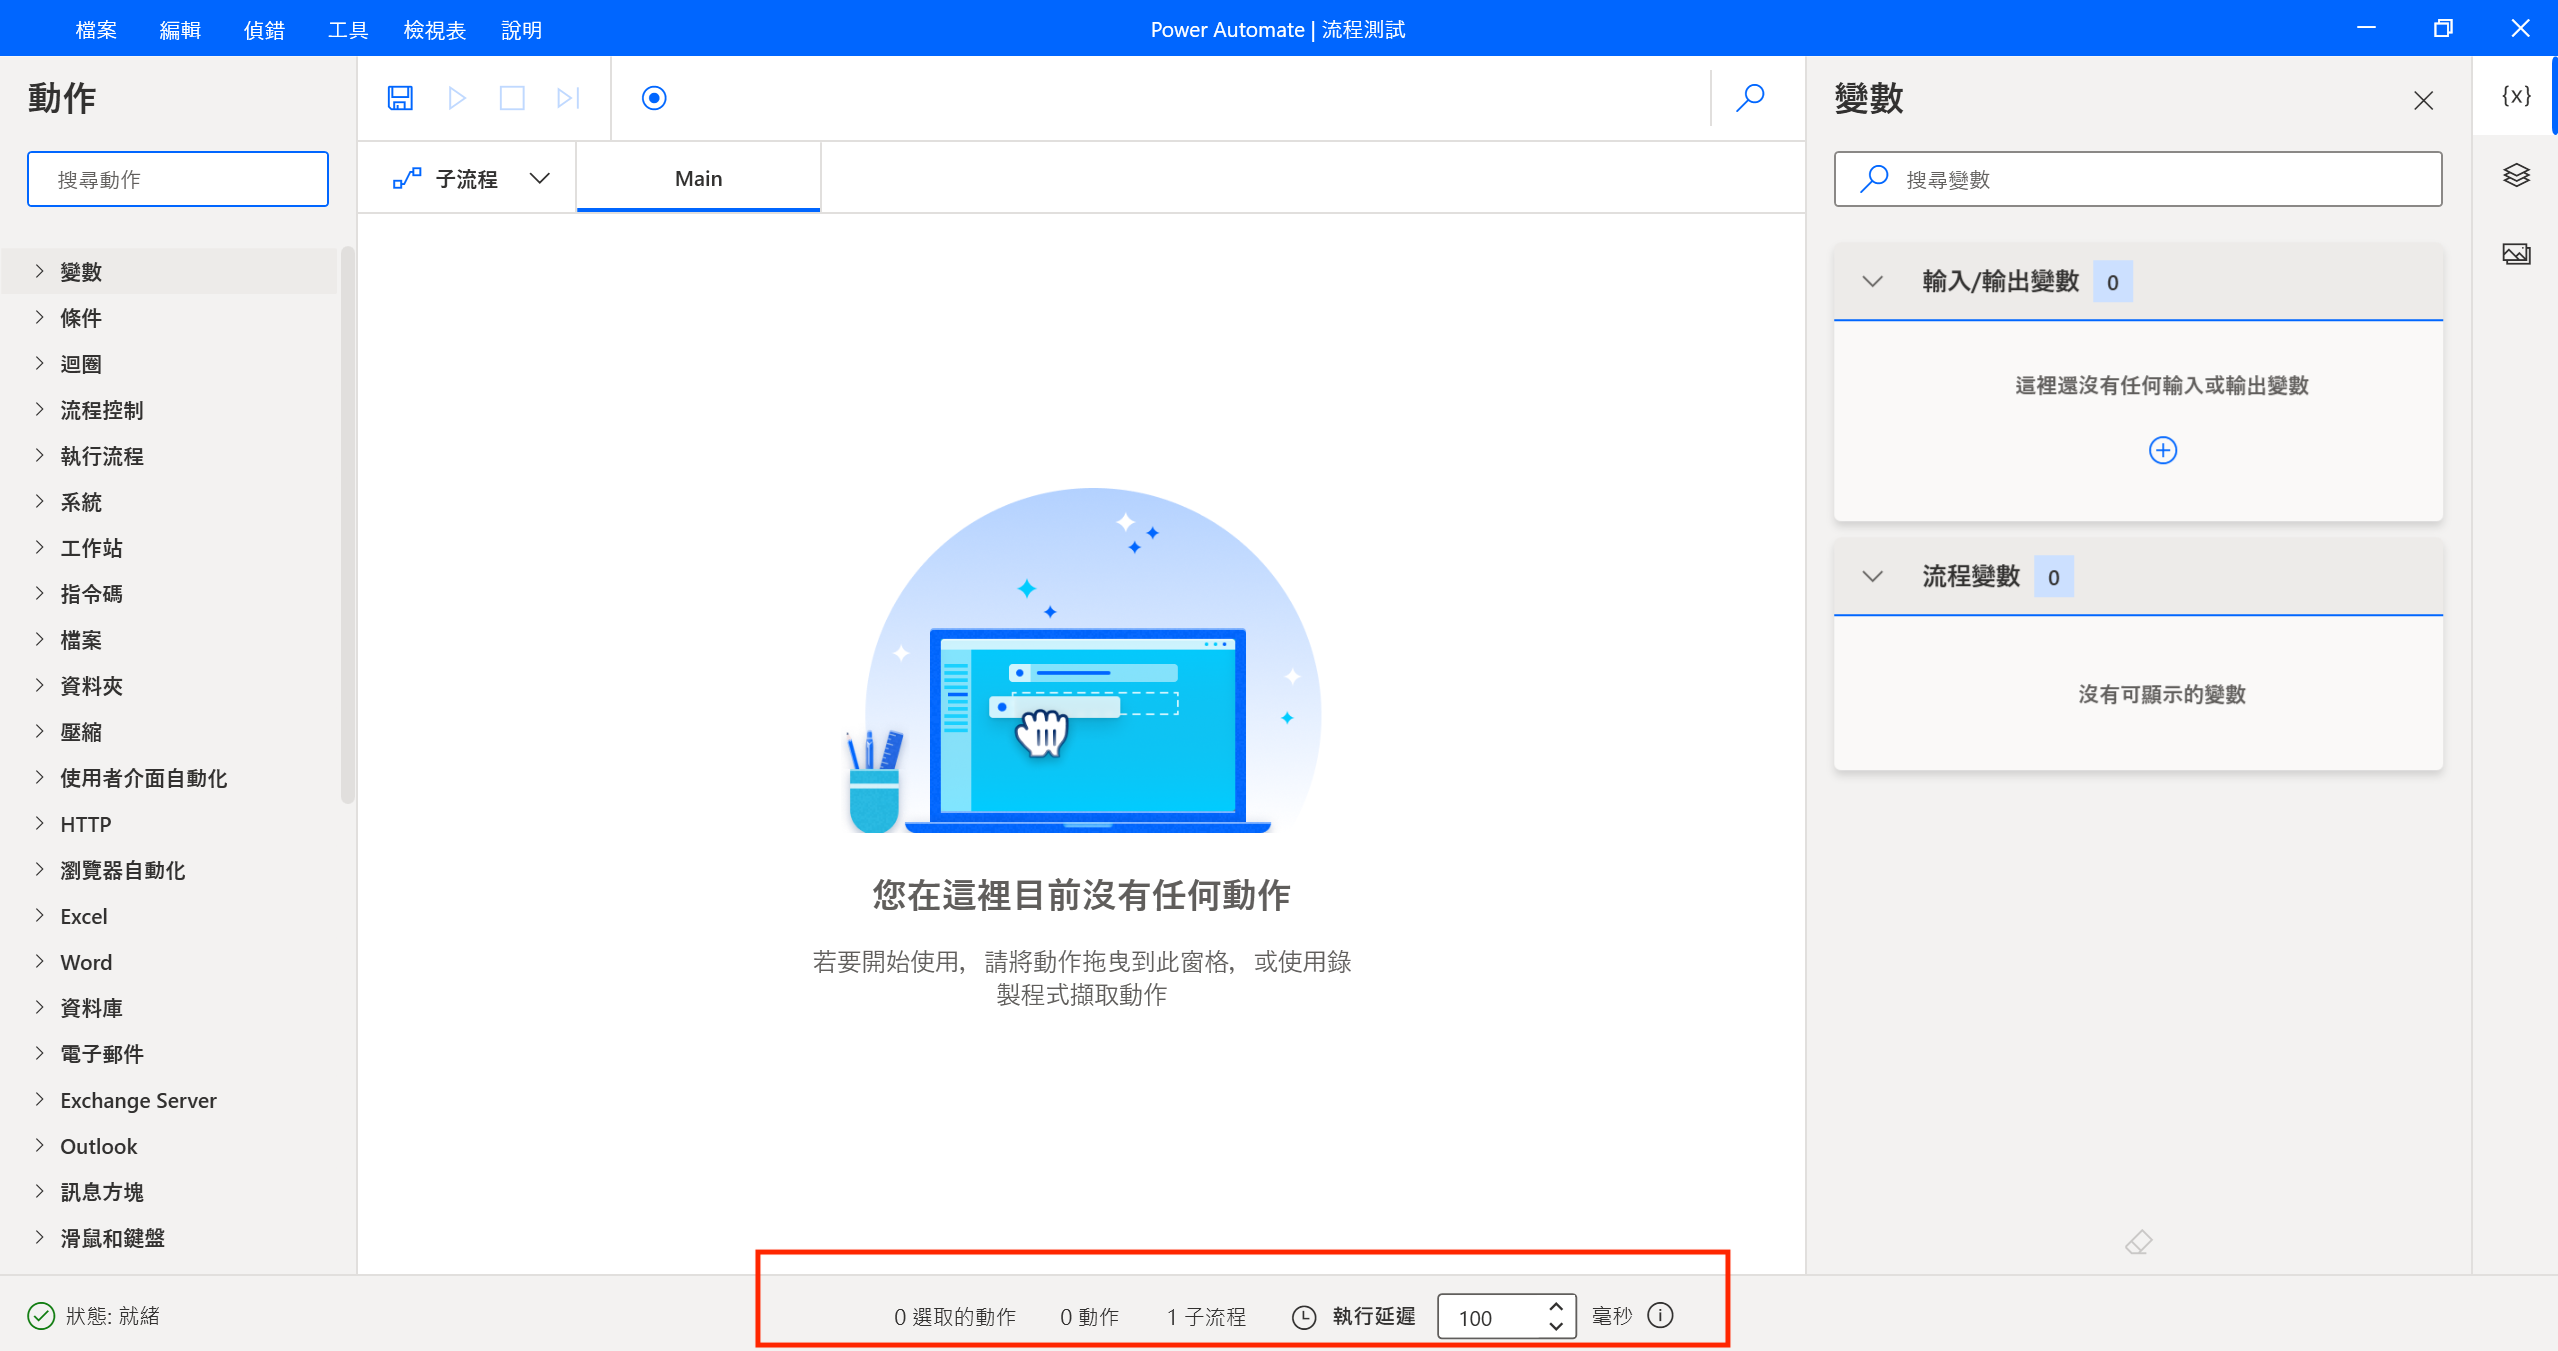
Output Pane
At the bottom. Shows runtime info.
- Log: Action and subflow count.
- Errors: Details when something fails.
- Action delay: Set a delay (ms) between actions so each step has time to finish.